Custom Sign Install & Huge Barn Door

Tackling Heavy Home Improvement Projects: A Tale of Two Installs
Here’s the thing about home improvement projects – they always look easier on TV. You see those perfectly staged reveals, and it seems like everything just… fits. But in the real world, with real homes and real challenges, it’s a different story. Recently, I dove into two pretty substantial projects that, while successful, definitely had their moments. These weren’t your average picture-hanging tasks; we’re talking heavy, custom work that required a bit more muscle and a lot more planning.
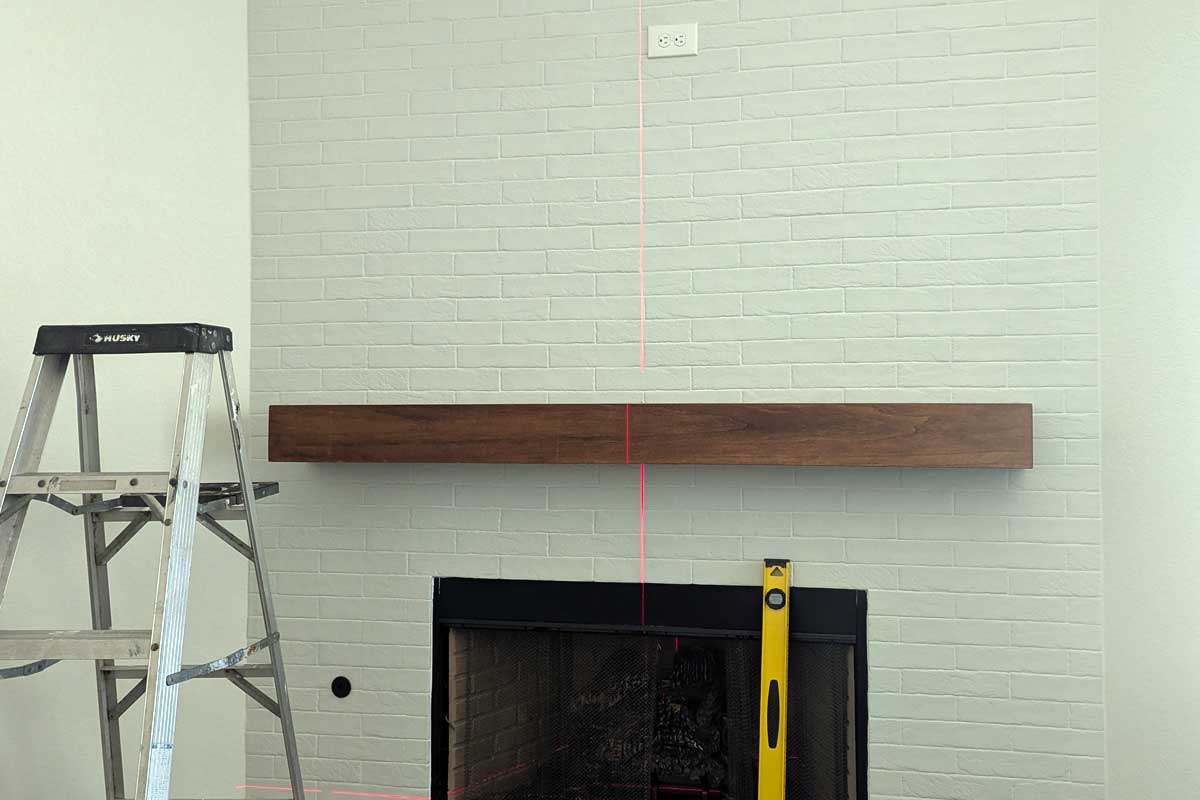
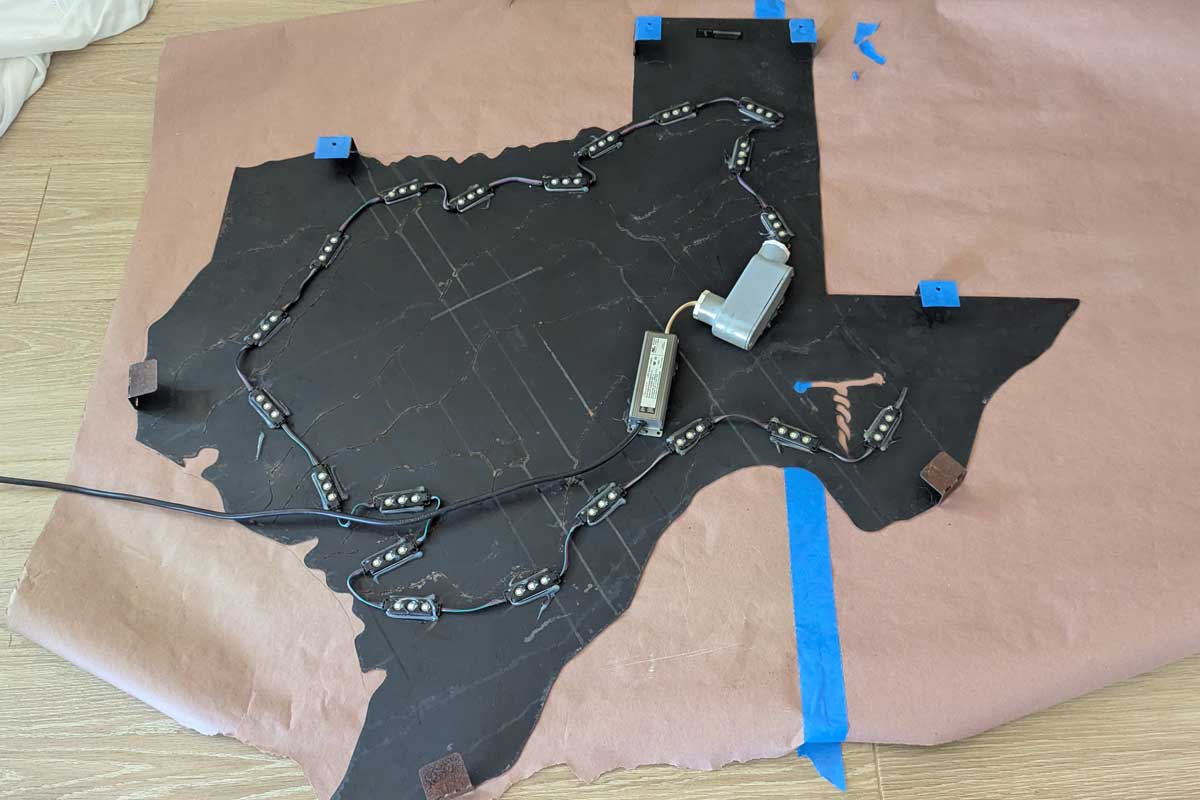
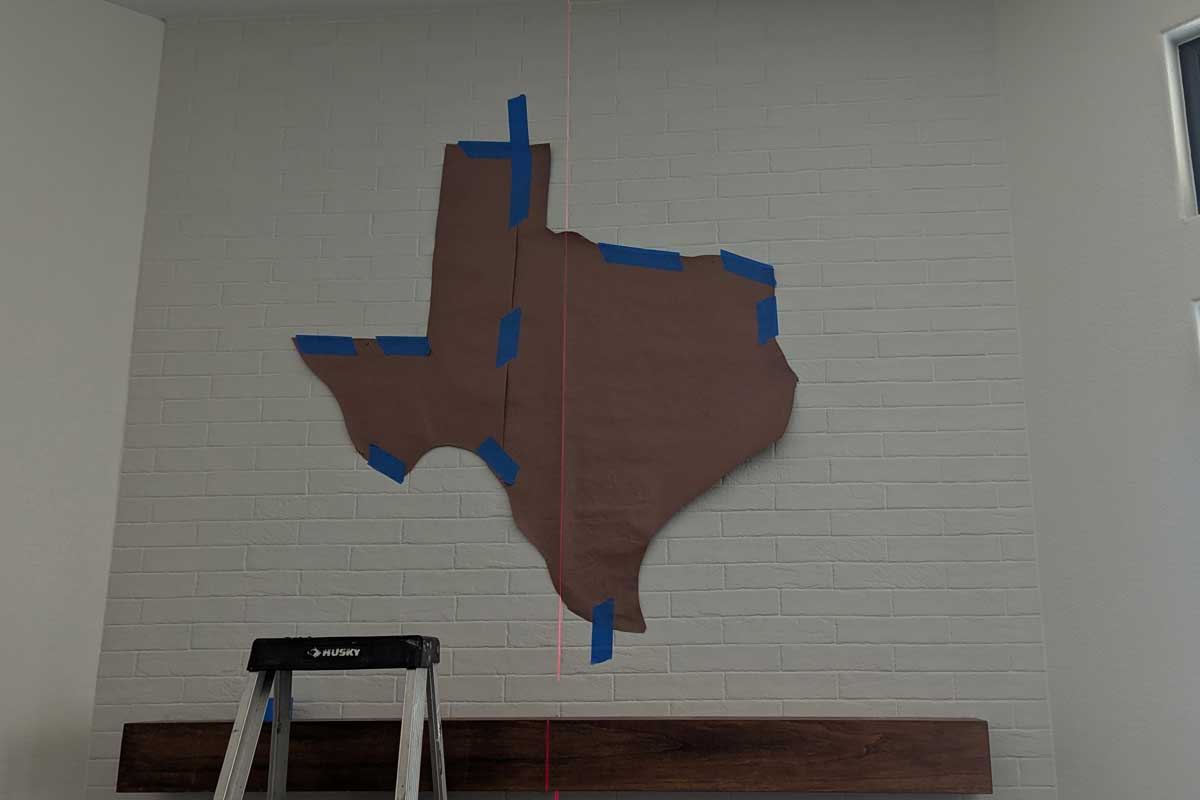
Project 1: The Backlit Metal Sign – A Triumphant Mount on Tile
First up was a beast of a sign. This wasn’t some flimsy plastic thing; it was a substantial, plasma-cut metal sign, heavy as heck, and equipped with a backlit kit. The plan? Mount it right above a fireplace mantle, directly onto ceramic tile. Now, you can’t just waltz in and expect to drill into tile and drywall with a regular bit. Oh no, that’s a recipe for disaster and shattered tile.
I knew this was going to be a delicate operation. So, I started by creating a paper template. This template was a game-changer, really, because it allowed me to perfectly mark where the sign’s mounting points would land without putting a single scratch on the tile. Once the template was secure, I grabbed my masonry drill bits. These are specifically designed to chew through tough materials like ceramic tile, and they made quick work of the holes.
Next, I encountered the hollow wall behind the tile. For a sign this heavy, I needed some serious anchoring. That’s where the Fliptoggle 209lbs.-rated Toggle Bolts came in. These things are champions of heavy-duty hanging, providing an incredibly secure anchor in hollow walls. With the holes drilled and the toggle bolts in place, the installation went off without a hitch. The laser level was my trusty co-pilot, ensuring everything was perfectly straight. It looked fantastic, really. The only hiccup? The outlet for the backlight didn’t have power. But hey, I just installed the sign, I didn’t wire the house!

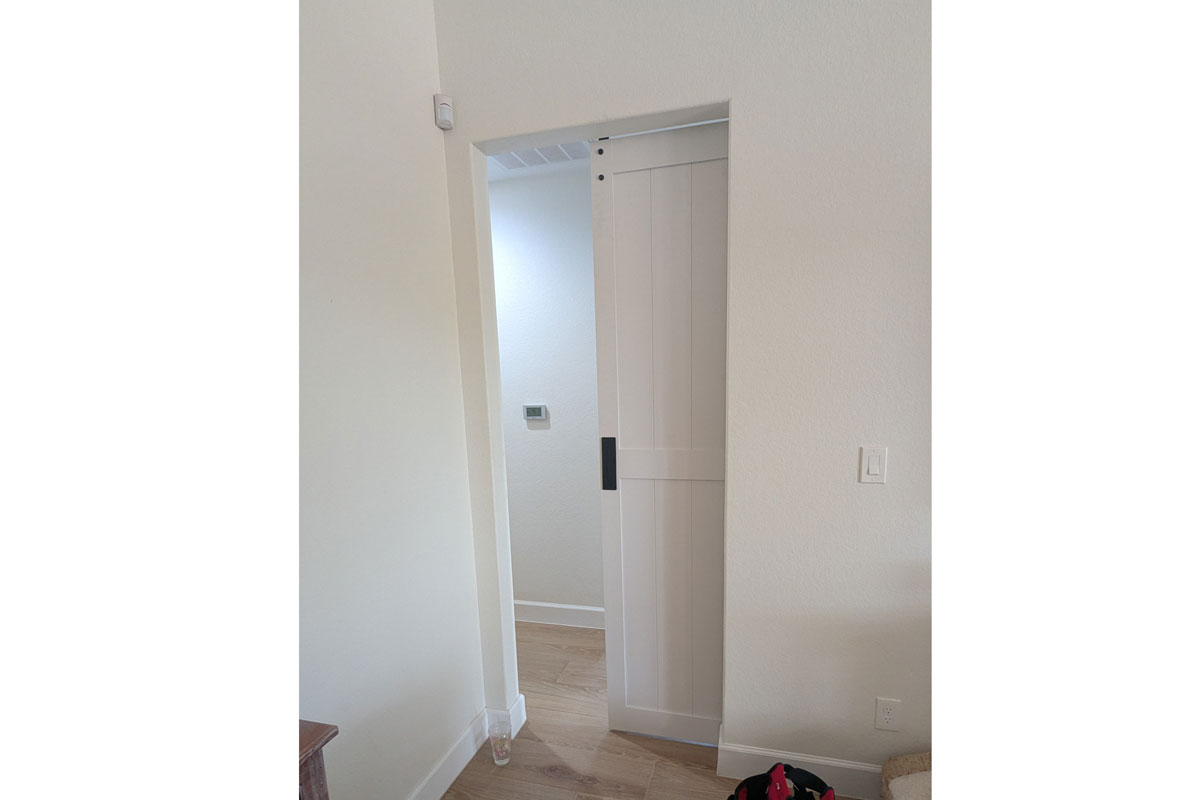
Part II: The Great Barn Door Installation
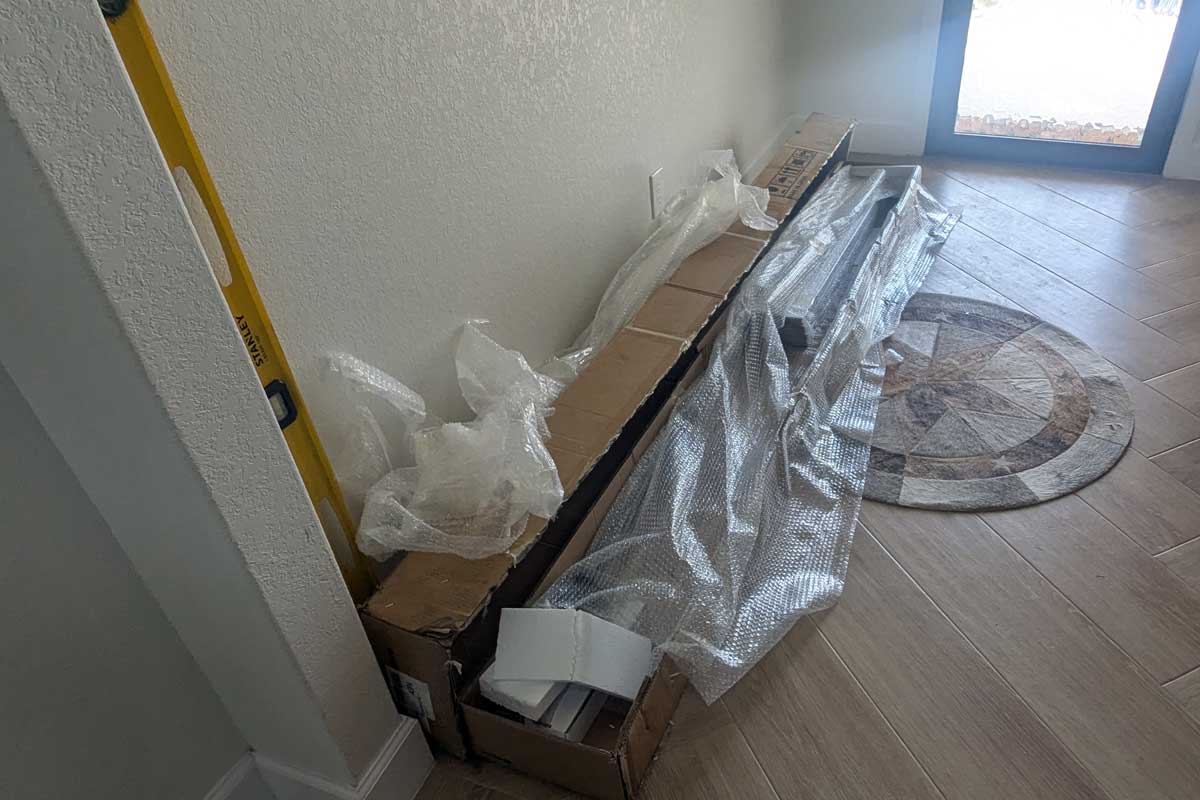
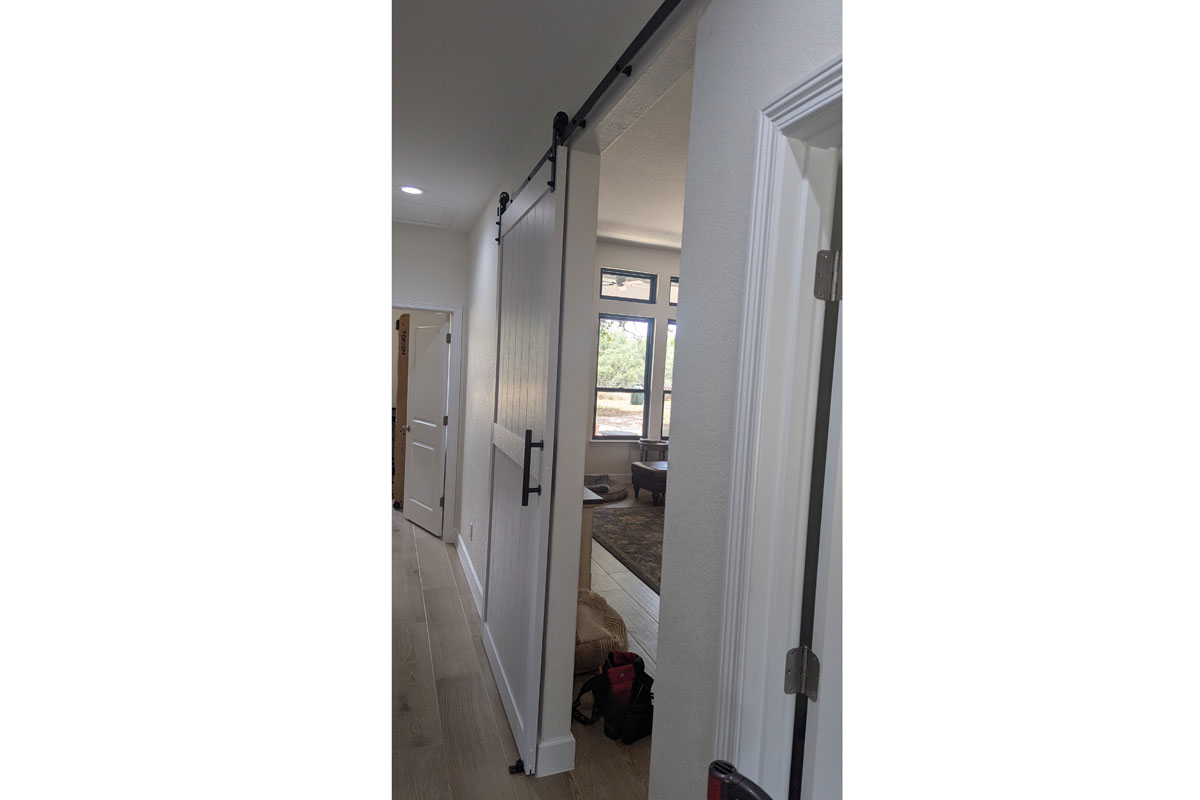
This second project was a different kind of challenge, but no less daunting. The mission: install a huge barn door between the main living area and the bedrooms. The homeowners wanted to create a divider to keep their dogs and cats on their respective sides of the house. The kit came with everything, the hardware and the door, which was a nice bonus. The catch? The door itself was an assembly project, much like something you’d get from Ikea, but on a grander scale.
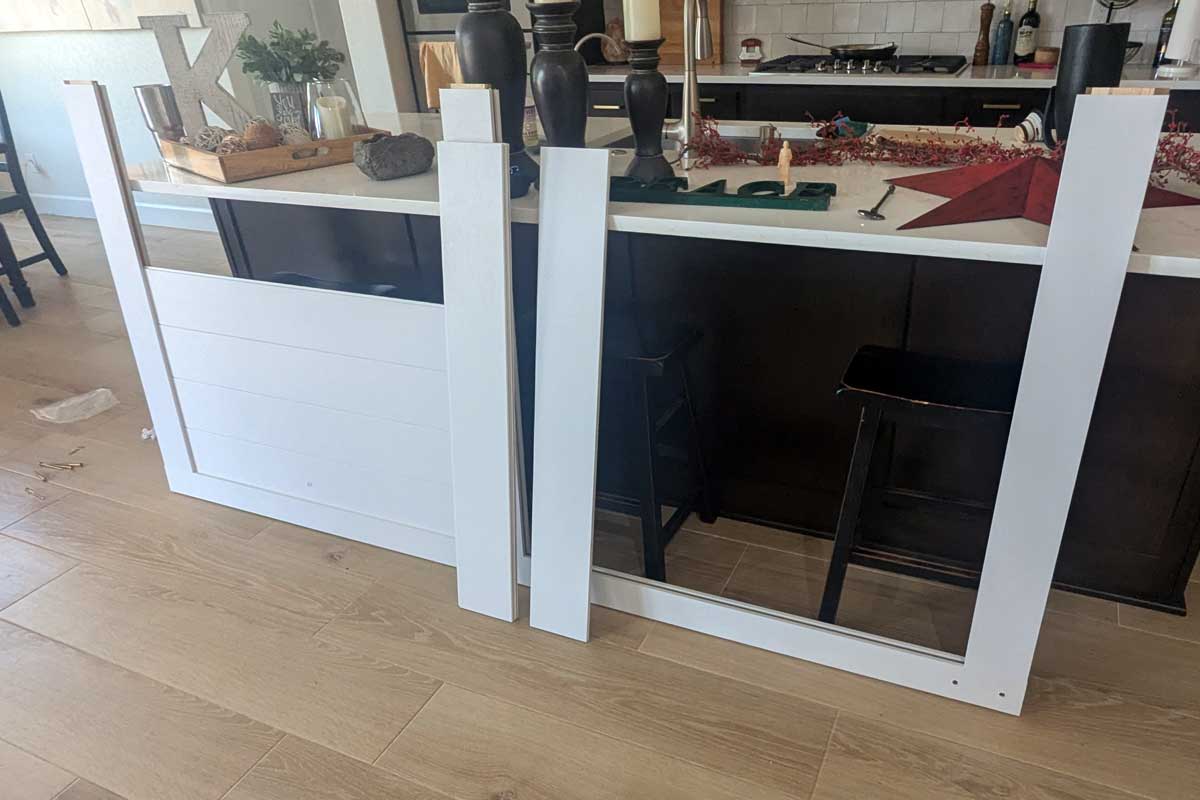
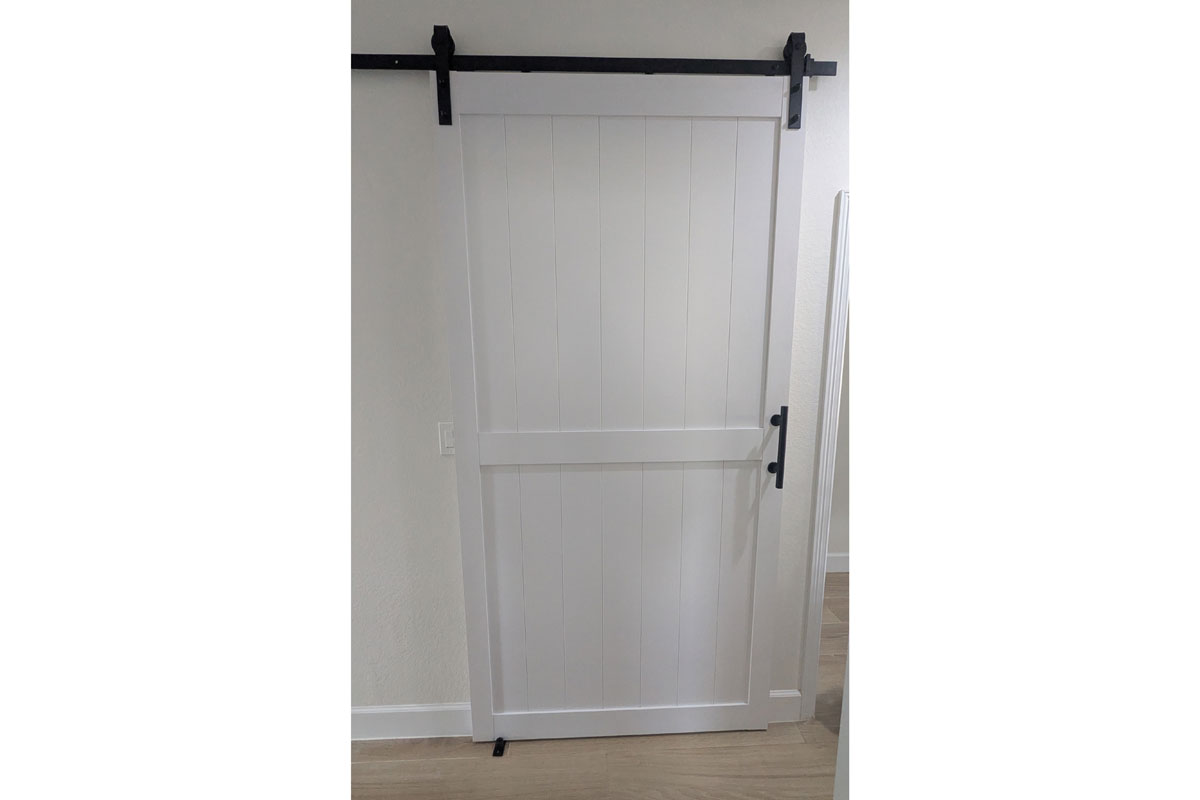
First, I had to assemble the door. It was a beast—four feet wide and nearly eight feet tall. Assembling it took more time than I anticipated, just because of its sheer size and weight. Once it was together, it was impressively heavy and solid.
Next came the rail. The rail is a long, metal bar that supports the entire weight of the door. The instructions give you a set of pre-drilled holes, 16 inches on center, but there’s a big problem: those holes rarely, if ever, line up with the studs in the wall. You absolutely cannot hang a door this heavy on drywall alone; it will rip right out. So, I had to measure, mark, and drill new holes in the metal rail to ensure each one hit a stud. This required a heavy-duty drill and a metal-cutting bit. It was a slow and meticulous process, but getting those holes just right was the difference between a successful install and a door crashing down.
Once the rail was securely mounted, the rest of the installation was fairly smooth. Getting the door up onto the rail was not fun, but once it was hanging, it glided effortlessly. The result was just what the homeowners wanted: a massive, beautiful barn door that both looked great and served its purpose perfectly. They were thrilled with the outcome, which they kindly shared in a Google review: “We hired Scott to hang a heavy piece if art on a tile wall and install a barn door. Scott arrived when he said he would. Both installs were executed in a very professional manner and look great. When he completed the job he left our house as clean as it was when he arrived. I would highly recommend Scott!” It’s that kind of feedback that makes all the sweating and planning worth it.
So there you have it—two home improvement projects that were a little more involved than they appeared on the surface. They took some planning, the right tools, and a healthy dose of patience, but the final results were well worth the effort.